
UV DTF (Direct-to-Film) wraps have taken the custom product world by storm, offering incredibly vibrant colors and a unique, raised 3D texture that looks professionally printed. They're perfect for personalizing tumblers, mugs, candles, and other hard, curved surfaces.
However, applying a flat sticker-like transfer to a round object can be tricky. Trapped air bubbles or an off-kilter design can ruin an otherwise perfect wrap. Don't worry – with the right technique, you can achieve a flawless, bubble-free finish every time!
What You'll Need:
UV DTF Wrap: Your chosen design.
Curved Surface: A tumbler, mug, glass, etc.
70%-90% Isopropyl Alcohol: For cleaning.
Lint-Free Cloth: Microfiber is ideal.
Felt-Edge Squeegee: Crucial for smooth application.
Scissors (Optional): To trim excess backing if your design is complex.
The "Hinge & Roll" Method for Bubble-Free Application:
Step 1: The Critical Clean & Prep This step is often overlooked but is the most important for bubble-free results.
Clean: Thoroughly wipe your curved surface with isopropyl alcohol and a lint-free cloth. This removes dust, oils, and any residue that could cause adhesion issues or trapped air.
Dry: Ensure the surface is completely dry before proceeding. Any moisture will be trapped under the wrap.
Step 2: Position Your Wrap (The Hinge Method) Do NOT peel the entire backing off at once! This is where most mistakes happen.
Align: With the backing still on, wrap your UV DTF design around your item. Adjust until it's perfectly straight, centered, and positioned exactly where you want it. Use tape if needed to hold it temporarily.
Create the Hinge: Carefully peel back just 1/2 to 1 inch of the backing paper from one vertical edge of your design. Fold this exposed backing flat against itself or cut it off.
Anchor: Firmly press that small, exposed adhesive strip onto your curved surface, ensuring it's straight and secure. This "hinge" will prevent your design from shifting as you apply the rest.
Step 3: The Slow Roll & Squeegee Technique This is where you push out the air as you go.
Tension: Hold the unpeelled portion of the wrap slightly away from the surface, keeping it taut.
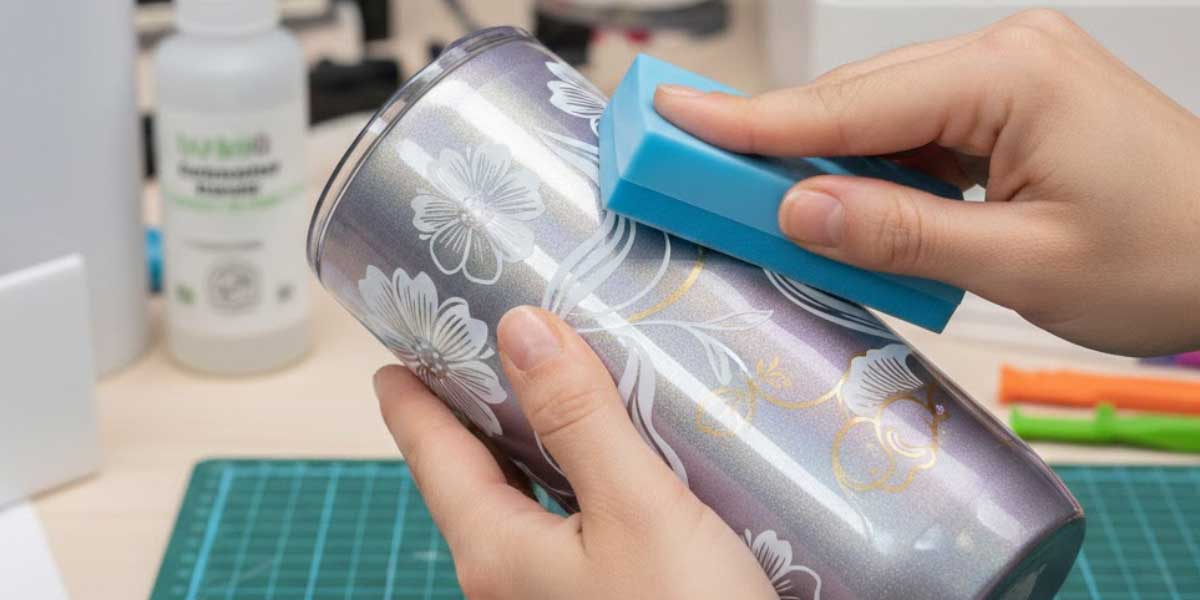
Peel & Squeegee Simultaneously: With one hand, slowly and steadily peel the backing paper away (often downward or to the side). As you peel, use your felt-edge squeegee (or even your thumb) to immediately press the exposed adhesive onto the surface.
Work Outward: Always move your squeegee from the center of the design outwards towards the edges. This action physically pushes any air bubbles out from under the design before the adhesive fully bonds. Apply firm, consistent pressure.
Step 4: The Hand-Warmth Activation Once the entire design is adhered to the surface (and the clear carrier film is still on), use the palm of your hand to firmly rub over the entire design for 30-60 seconds.
Why? The friction generates a small amount of heat that helps the UV adhesive "cure" and bond more effectively to the microscopic pores of the surface. This dramatically improves durability and helps prevent lifting.
Step 5: The "Low and Slow" Final Peel Now it's time to remove the clear top carrier film.
Angle: Start from one corner and peel the carrier film back at a sharp, low 45-degree angle.
Observe: Watch closely as you peel. If you see any part of your design lifting off the surface with the carrier film, stop immediately! Press the design back down firmly, rub it again with your hand or squeegee, and then continue peeling slowly.
Finished! Once the carrier film is fully removed, you'll be left with a beautiful, bubble-free UV DTF wrap!